Thursday, 2 April 2015

Window Motor Regulator Replacement

How To Replace Car Window Motor 


Helpful Information

An electric power window is controlled by three main parts; motor, regulator and a control switch and can fail in many ways, some of the more popular failures include non operation (stuck), window loose in its track sitting down while the motor turns. In some cases there are minor adjustments for the window rails to re-position the window if needed, check vertical operation for hard spots or clicking noises.

All power window system are protected by a fuse which should be checked if the window is non-operational.

Common Problems

Motor shorts out and stops working, or works very slowly.

The control switch short circuits, due to excessive amperage draw from a worn out motor.

Easy step by step guide on how to replace an automotive window motor and regulator, though the configuration may vary, the process is the same, this information pertains to most vehicles.
Difficultly Level - 4
Begin the vehicle on level ground, engine "OFF" with the parking brake set, using a basic set of tools while wearing gloves and protective eyewear. Warning; Some electric window regulators are equipped with a helper spring that can have tension, use caution when disassembling.
Step 1 - To access the window regulator and motor assembly the door panel must be removed.
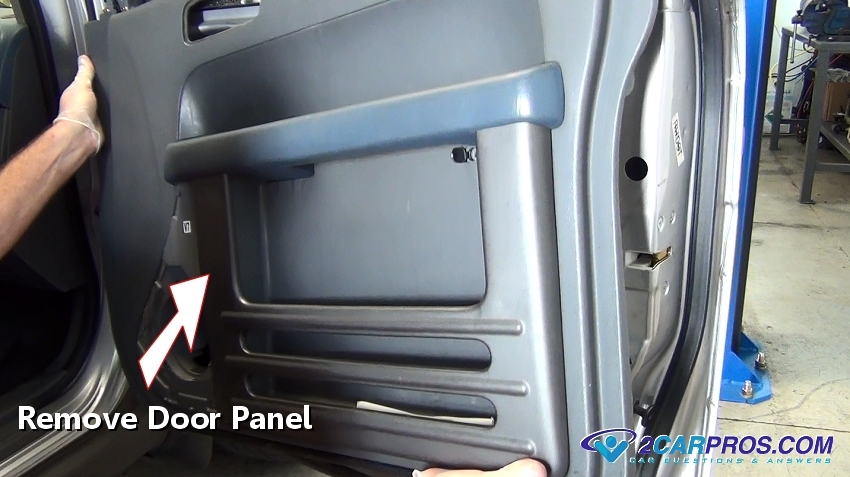
Remove Door Panel
Step 2 - Gently remove the plastic door cover, this cover is used to keep moisture away from the door panel.
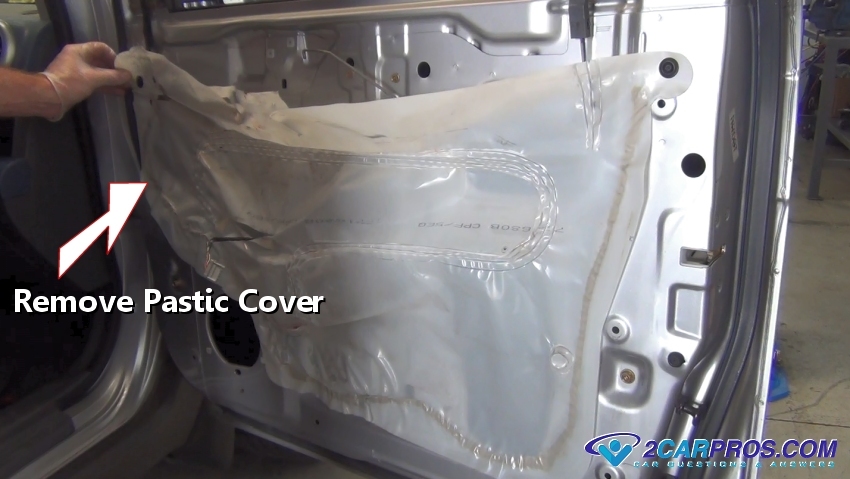
Remove Plastic Door Cover.
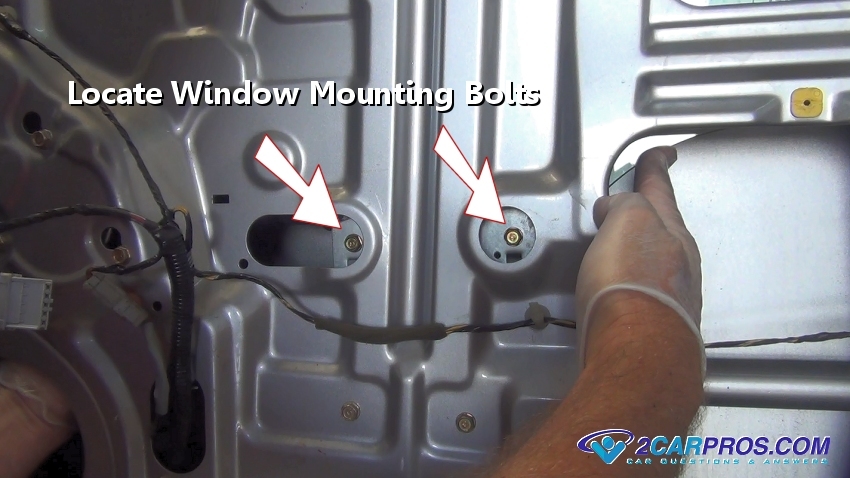
Step 3
 - Locate the window mounting bolts, the window may need to be raised or lowered to access the bolts.
Access Window Mounting Bolts
Step 4 - While supporting the window, remove the window mounting bolts from the window regulator, once the bolts have been removed the window will become loose in the track.
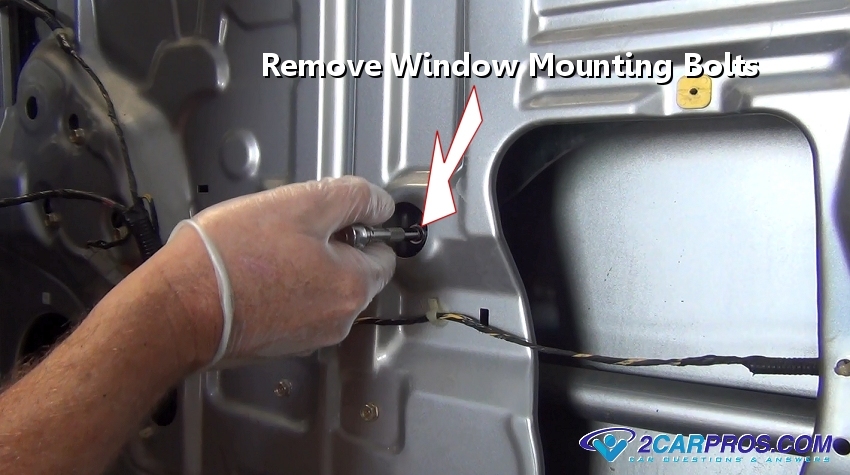
Remove Window Mounting Bolts
Step 5 - While the glass is loose in its track, raise the window until it contacts the upper portion of the frame.
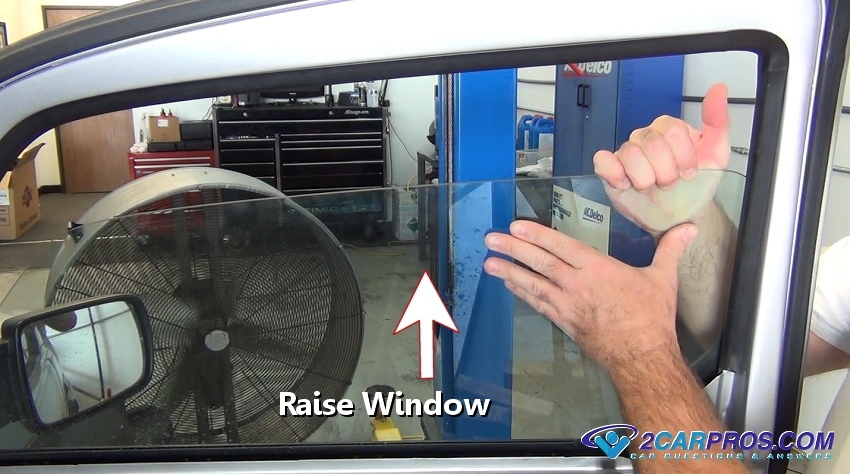
Raise Window
Step 6 - While holding the window in place, use masking tape to secure the window from dropping down and possibly breaking inside the door, this step keeps the glass out of the way while removing the regulator and motor.
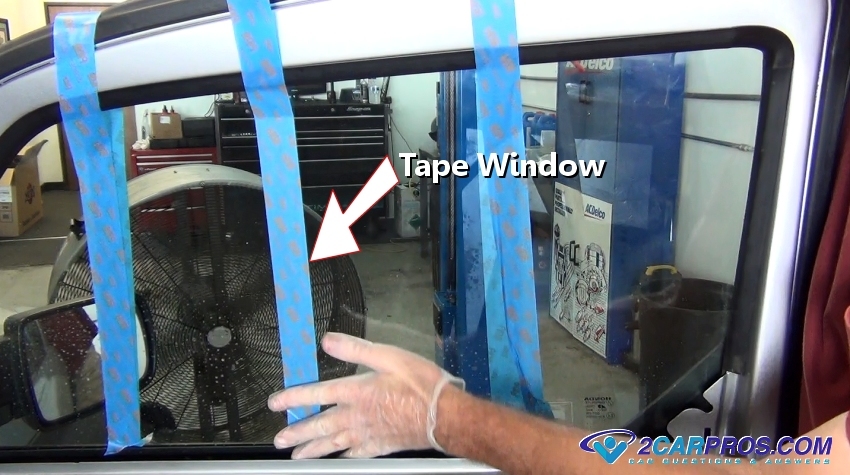
Masking Tape Window
Step 7 - Locate and remove the window regulator, gently set the unit inside the door until the motor is removed. (Note: They are connected to each other.)
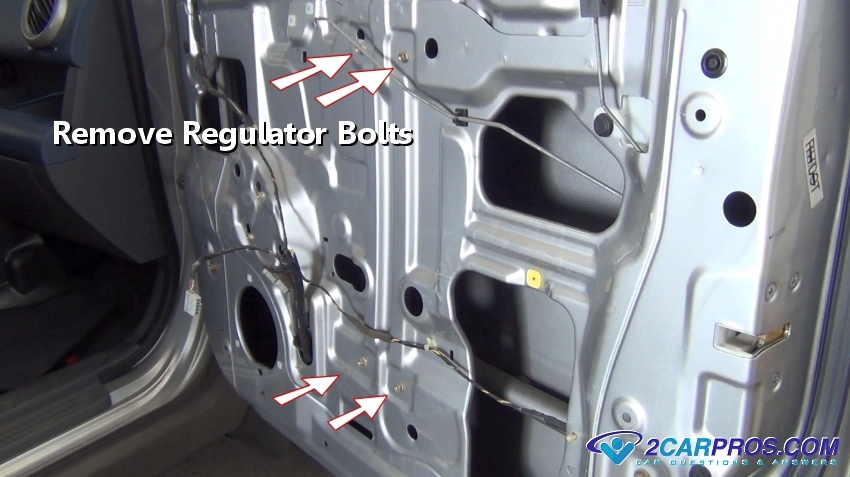
Removing Regulator Bolts
Step 8 - While the regulator is resting inside the door, locate and remove the window motor mounting bolts. (Note: In this application the bolts can be loosened to remove.)
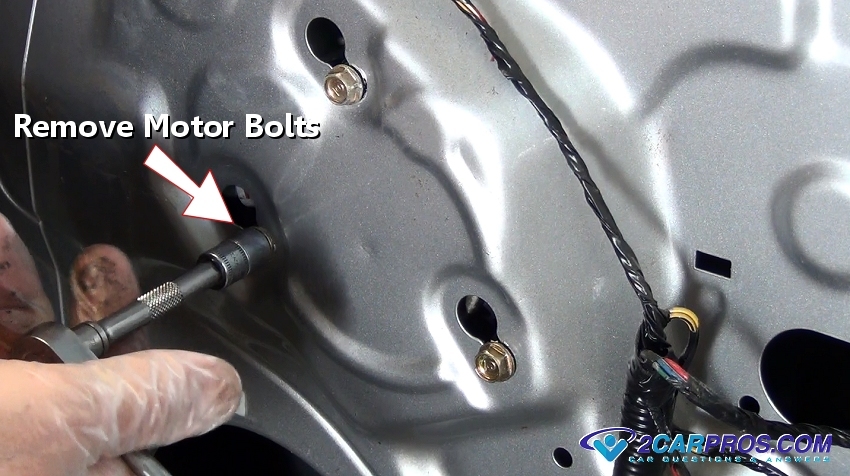
Remove Motor Bolts
Step 9 - After both the motor and regulator bolts have been removed, locate the motor wiring harness connector, press the release tab to disconnect.
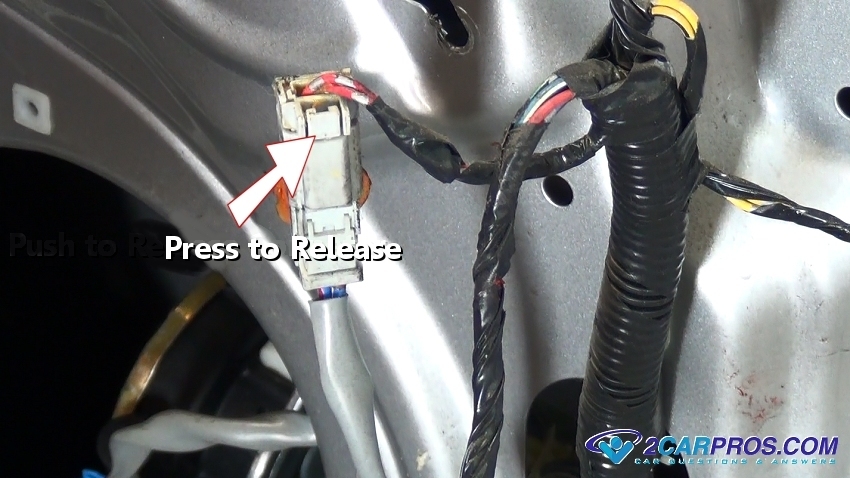
Press to Release Connector
Step 10 - Remove the regulator and motor assembly through the large access port.
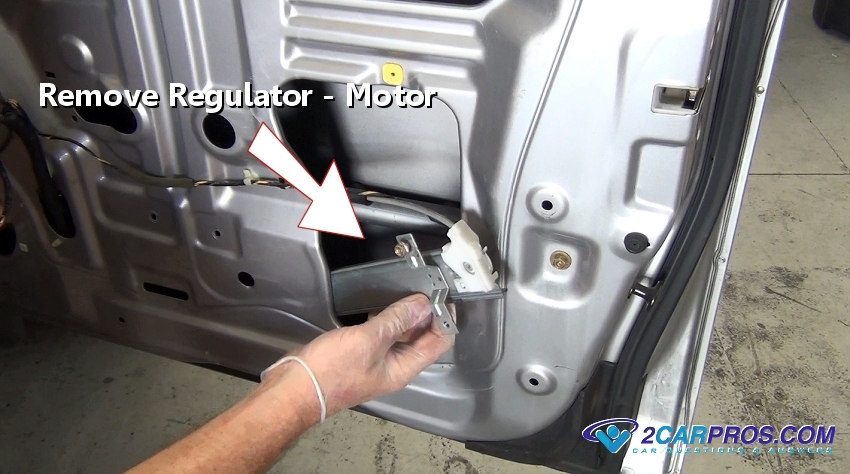
Removing Motor and Regulator
Step 11 - Window regulator and electric motor removed.
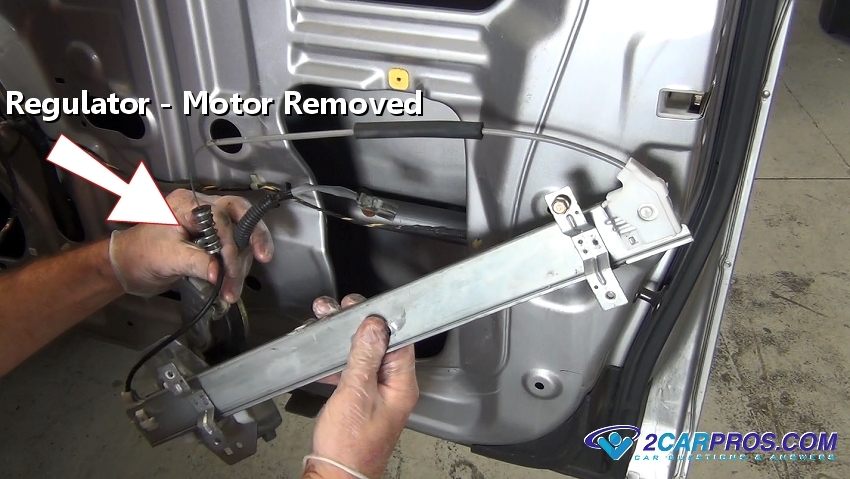
Window Motor and Regulator Removed
Step 12 - Match the old unit to the new to ensure a proper installation. (Note: Check electrical connectors as well.)
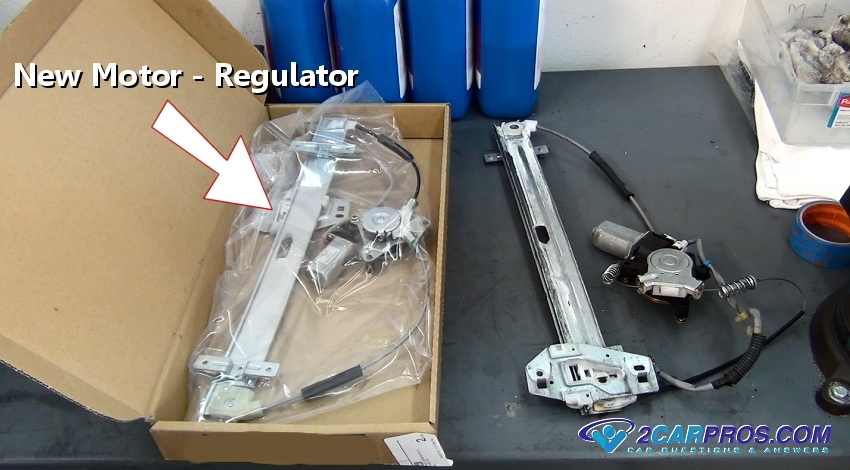
New Window Motor and Regulator
Step 13 - Gently feed the new motor and regulator assembly back into position, this can be a little tricky so hang in there.
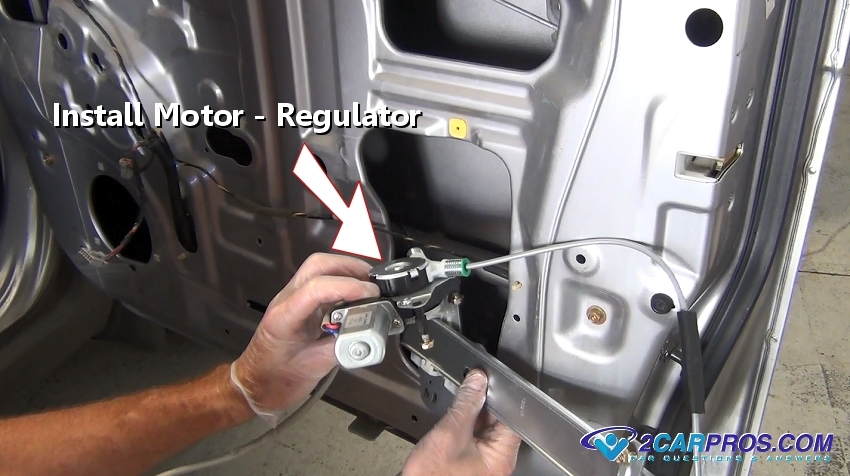
Install New Window Motor and Regulator
Step 14 - Once the motor and regulator has been re-positioned, re-install all mounting bolts leaving them loose until all have been installed.
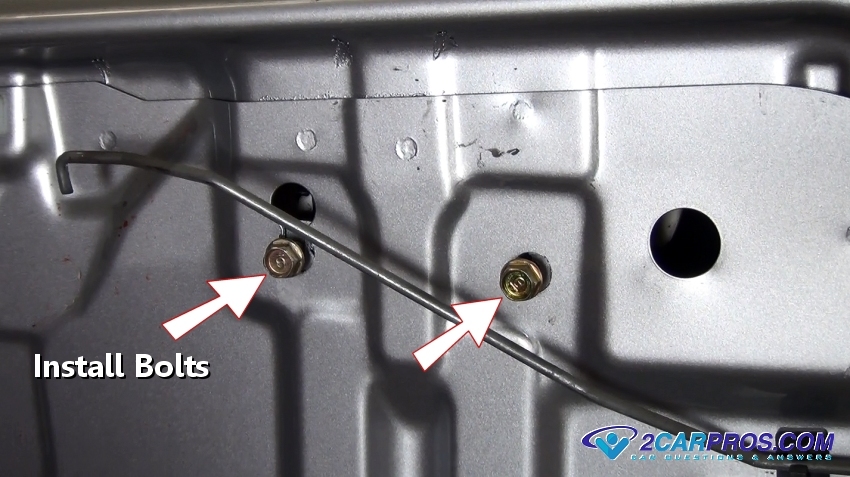
Install Regulator and Motor Bolts
Step 15 - Using a ratchet or wrench tighten the motor and regulator mounting bolts.
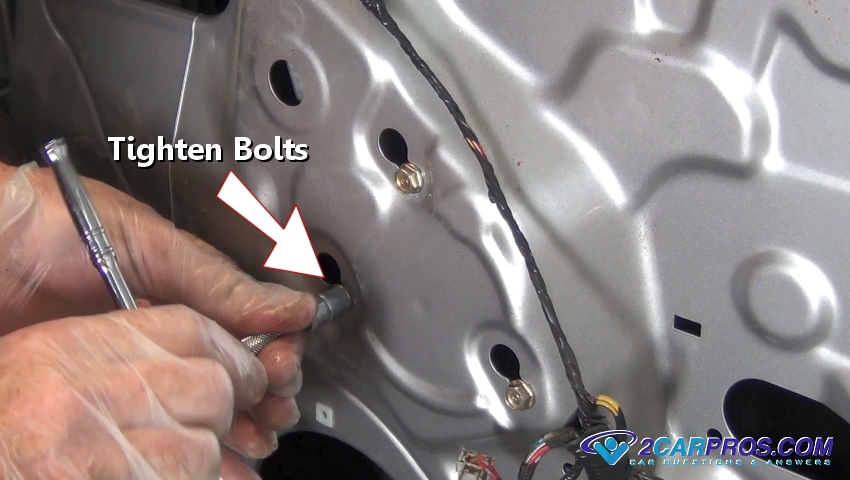
Tighten Window Motor Bolts
Step 16 - Feed the electrical connector through and reconnect to the door wiring harness.
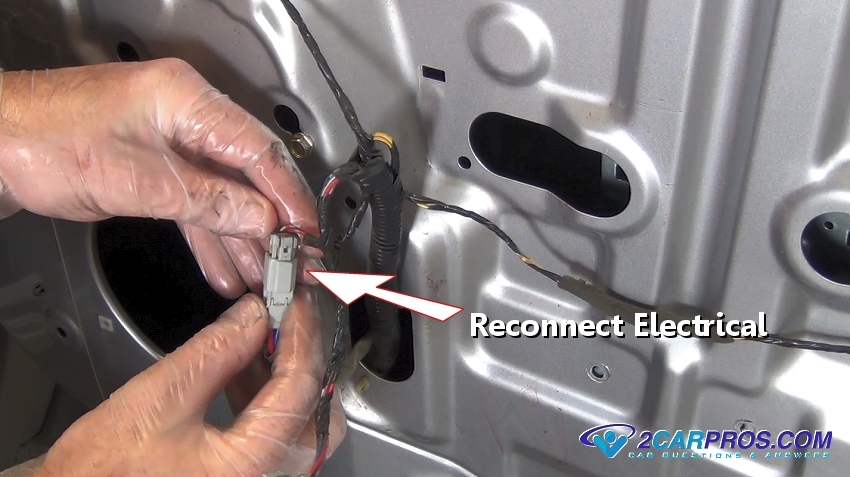
Reconnect Motor Electrical Connector
Step 17 - While holding the window in place, remove the masking tape and lower the window into the new regulator.
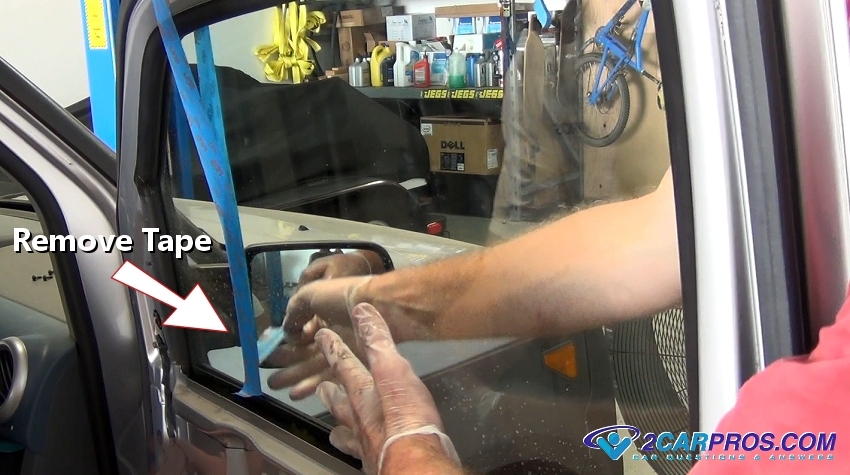
Un-Taping Window
Step 18 - Once the window is lowered into place, thread in and tighten the mounting bolts.
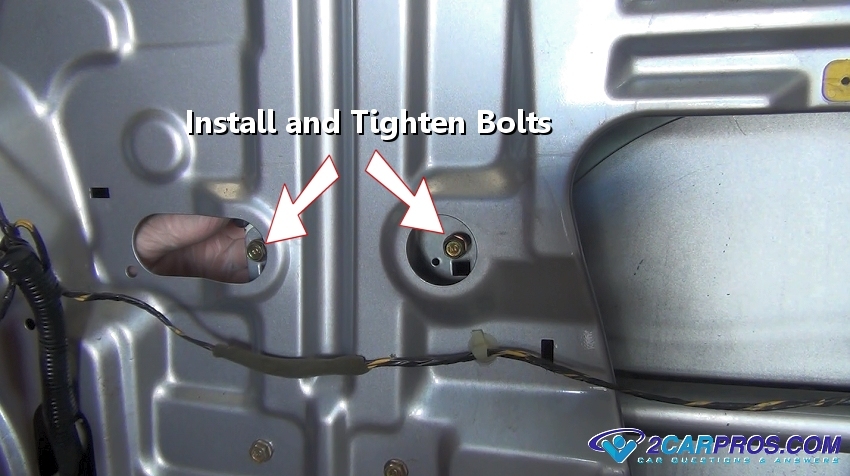
Install Window Mounting Bolts
Step 19 - Recheck all mounting bolts for tightness and re-install the plastic weather liner and door panel assembly.
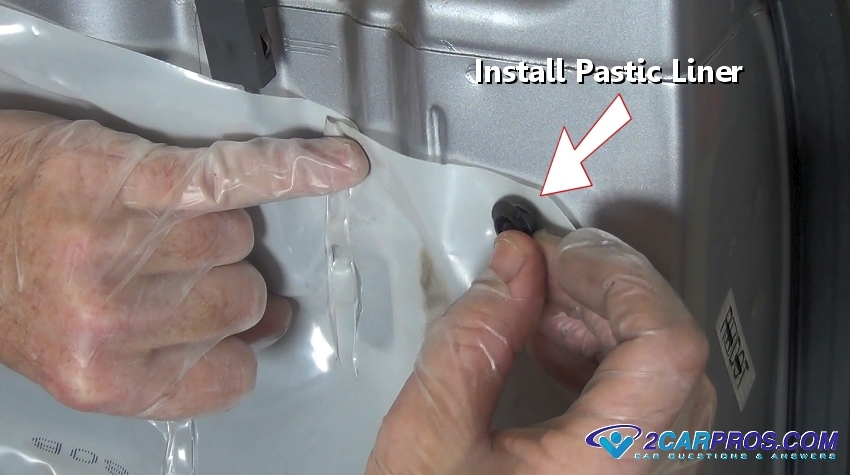
Re-install Plastic Liner
Step 20 - Once the job in complete, turn the ignition switch to the "ON" position and test both up and down actions of the window motor.
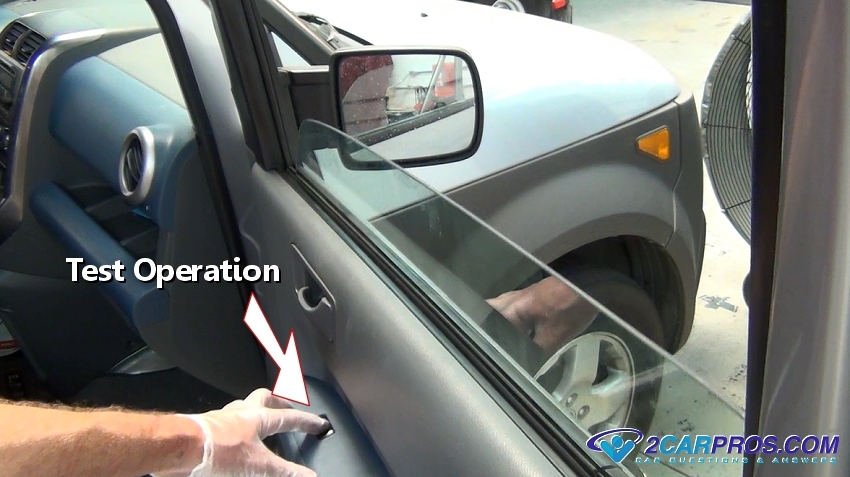
Test Window Motor Operation

Door Not Closing

Step by step guide on how to repair an automotive car door that wont close. This article pertains to all vehicles.
Difficulty Scale: 1 of 10
Tool and Supplies Needed
  • Small screw driver
  • Flashlight
  • Gloves
     
Begin with the vehicle on level ground in park with the emergency brake on.
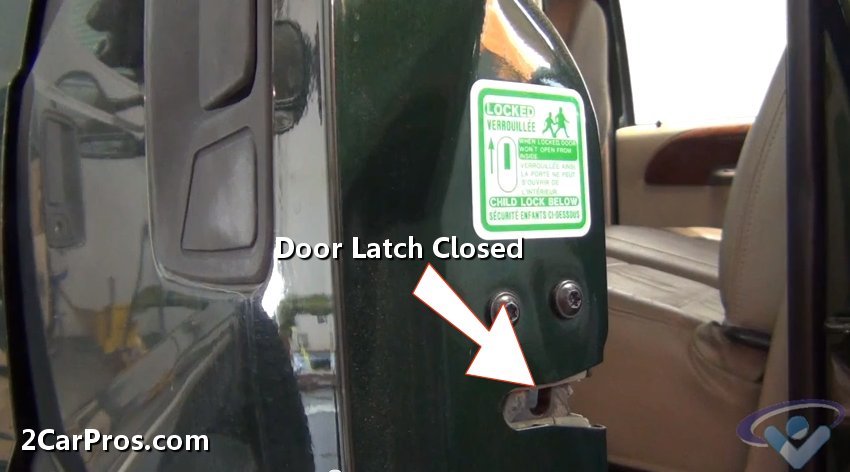
Step 1 - Open the door and inspect the door latch to see if the orientation of the clasp is in the closed or open position.

Door Latch Closed

Step 2
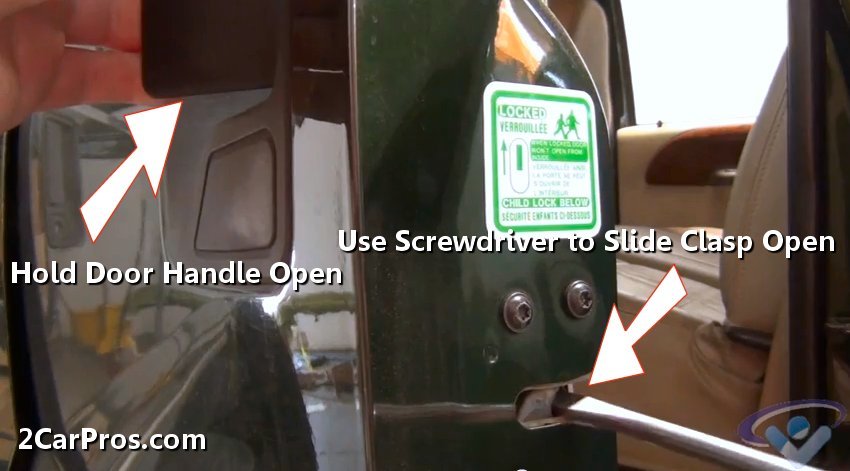
 - While holding the door handle in the "OPEN" position use a screwdriver or equivalent (Note: This operation is easy so almost anything can be used.)
Opening Door Latch Clasp
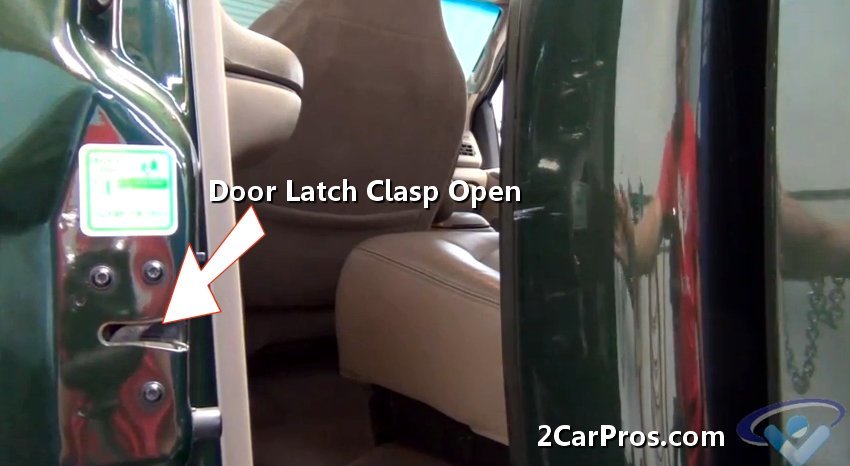
Step 3 - Once the door latch clasp has been released the door will return to normal working order.

Door Latch Clasp Open Position
Helpful Information
On any car there are a few compartments that open and close at the will of the user. These compartments include car hood, doors, trunk, glove box and center-upper consoles. The one thing all of these compartments have in common is a latch mechanism that holds the lid, door or hood closed. Door latches contain a locking device that allow the user to lock the operation of the latch. On the opposite side of all latches is the "striker" which is the part where the latch holds onto when closed. This latch mechanism is designed to hold the striker within the latch clasp. When the clasp is released, the striker is free to move allowing the the door to open. For the latch to work properly the alignment of the striker is crucial. Occasionally when a latch is opened it can have a "rebound" effect that can sometimes close the latch the second it opens. When a "rebound" occurs the door, hood or truck opens but the latch is now closed and will not except the striker and will not allow the door, hood or lid to close. This means the latch will have to be opened before it will reconnect to the striker.
Common Problems
  • When a door latch fails it will not allow you to open or close the latch
  • If door hinges are allowed to move excessively the striker will be out of place causing the striker to be located the wrong position causing the latch to not operate properly.
  • An activation rod will become dislodged not actuating the door latch release. If this occurs the inner door panel must be removed to activate the latch release manually.
  • The inner or outer door handle will fail not moving the activation rod that connect to the latch release. This will result in latch operation failure. In both cases the inner door panel, must be removed to activate the control rod manually.
  • Depending on the application some latches are equipped with an electric solenoid that can automatically open or close the lock with a simple key fob or electronic switch command. A switch command can be activated manually or by the BCM (body control module) computer. These automatic controlled latches also possess the ability to detect the use of force when it is used to overpower the latch as in a criminal act. When the latch is overpowered the car alarm will sound to alert the car owner.
Best Practices
  • All hinges should be free from lateral movement and maintained by applying lubricant at regular intervals. To ensure proper latch operation all moving parts must be free from dirt and grime. To clean a door or compartment latch use a mild solvent or soap. Once clean, dry thoroughly and apply lubricant as needed.
  • Confirm the door latch is unlocked

Tuesday, 31 March 2015

How To Repair Car Problem

How To Repair your Car Yourself

How To Service Your Car


In your car there are many parts that can cause problem.To confirm the problem it takes time.But once you are confirm with the problem the next step is moving towards repair car problem.

Car repair problems are of many types.Below is the basic list of common car repair problems which many car owners face.
Repair car electrical problems,repair car overheating problem ,repair car suspension problem ,car repair starter problems,repair car air conditioner problems ,car repair transmission problems,car repair electrical problems,car repair didn't fix problems,fixing car overheating problems ,how to repair car starter problems,
car repair troubleshooting starting problems,car seat repair problems,car amplifier repair problems ,car wiring problem repair.

Now From the List Below Choose the Section in which you notice car problem.


Body:


Brake System:


Car Noises:


Climate Control:


WARNING LIGHT


Cooling System

Drivetrain


Electrical:


Engine Mechanical:


Engine Performance:


Fuel System:


Suspension