Step by step guide on how to repair an automotive car door that wont close. This article pertains to all vehicles.
Difficulty Scale: 1 of 10
Tool and Supplies Needed
Step 1 - Open the door and inspect the door latch to see if the orientation of the clasp is in the closed or open position.

Door Latch Closed
 Step 2 - While holding the door handle in the "OPEN" position use a screwdriver or equivalent (Note: This operation is easy so almost anything can be used.)
Opening Door Latch Clasp
Step 3 - Once the door latch clasp has been released the door will return to normal working order.

Door Latch Clasp Open Position
Helpful Information
On any car there are a few compartments that open and close at the will of the user. These compartments include car hood, doors, trunk, glove box and center-upper consoles. The one thing all of these compartments have in common is a latch mechanism that holds the lid, door or hood closed. Door latches contain a locking device that allow the user to lock the operation of the latch. On the opposite side of all latches is the "striker" which is the part where the latch holds onto when closed. This latch mechanism is designed to hold the striker within the latch clasp. When the clasp is released, the striker is free to move allowing the the door to open. For the latch to work properly the alignment of the striker is crucial. Occasionally when a latch is opened it can have a "rebound" effect that can sometimes close the latch the second it opens. When a "rebound" occurs the door, hood or truck opens but the latch is now closed and will not except the striker and will not allow the door, hood or lid to close. This means the latch will have to be opened before it will reconnect to the striker.
Common Problems
Difficulty Scale: 1 of 10
Tool and Supplies Needed
- Small screw driver
- Flashlight
- Gloves
Step 1 - Open the door and inspect the door latch to see if the orientation of the clasp is in the closed or open position.
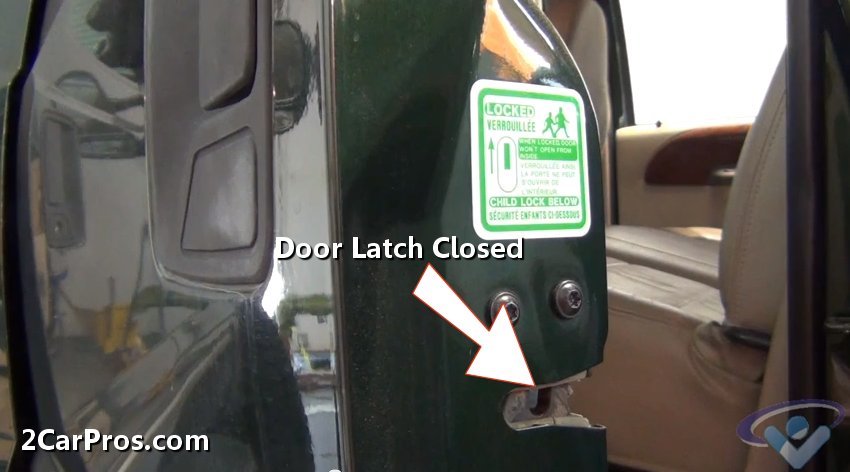
Door Latch Closed
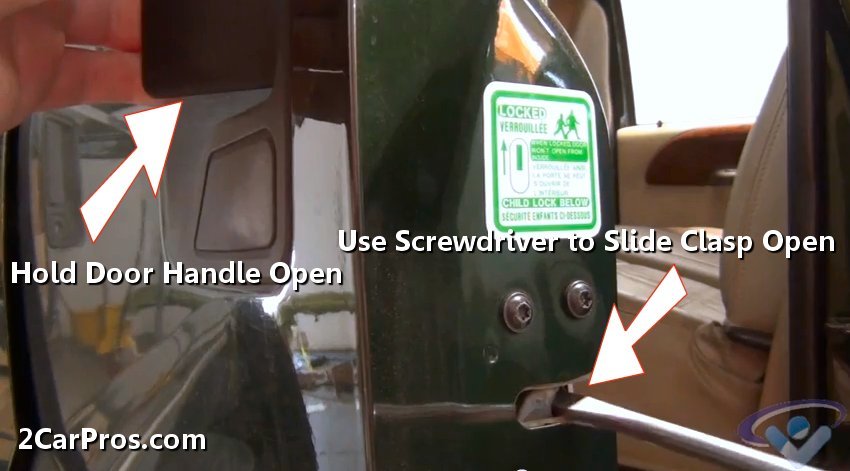 Step 2 - While holding the door handle in the "OPEN" position use a screwdriver or equivalent (Note: This operation is easy so almost anything can be used.)
Opening Door Latch Clasp
Step 3 - Once the door latch clasp has been released the door will return to normal working order.
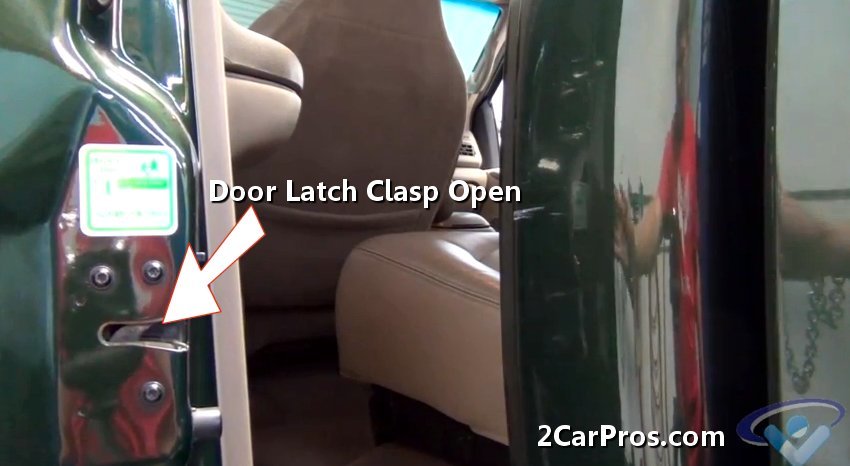
Door Latch Clasp Open Position
Helpful Information
On any car there are a few compartments that open and close at the will of the user. These compartments include car hood, doors, trunk, glove box and center-upper consoles. The one thing all of these compartments have in common is a latch mechanism that holds the lid, door or hood closed. Door latches contain a locking device that allow the user to lock the operation of the latch. On the opposite side of all latches is the "striker" which is the part where the latch holds onto when closed. This latch mechanism is designed to hold the striker within the latch clasp. When the clasp is released, the striker is free to move allowing the the door to open. For the latch to work properly the alignment of the striker is crucial. Occasionally when a latch is opened it can have a "rebound" effect that can sometimes close the latch the second it opens. When a "rebound" occurs the door, hood or truck opens but the latch is now closed and will not except the striker and will not allow the door, hood or lid to close. This means the latch will have to be opened before it will reconnect to the striker.
Common Problems
- When a door latch fails it will not allow you to open or close the latch
- If door hinges are allowed to move excessively the striker will be out of place causing the striker to be located the wrong position causing the latch to not operate properly.
- An activation rod will become dislodged not actuating the door latch release. If this occurs the inner door panel must be removed to activate the latch release manually.
- The inner or outer door handle will fail not moving the activation rod that connect to the latch release. This will result in latch operation failure. In both cases the inner door panel, must be removed to activate the control rod manually.
- Depending on the application some latches are equipped with an electric solenoid that can automatically open or close the lock with a simple key fob or electronic switch command. A switch command can be activated manually or by the BCM (body control module) computer. These automatic controlled latches also possess the ability to detect the use of force when it is used to overpower the latch as in a criminal act. When the latch is overpowered the car alarm will sound to alert the car owner.
- All hinges should be free from lateral movement and maintained by applying lubricant at regular intervals. To ensure proper latch operation all moving parts must be free from dirt and grime. To clean a door or compartment latch use a mild solvent or soap. Once clean, dry thoroughly and apply lubricant as needed.
- Confirm the door latch is unlocked


